JACOB KELLER
GARMENT BLEACHING
Jacob Keller, owner and designer of Bare Knuckles, took over the Russell Athletic IG Channel to share his knowledge on bleaching garments to create unique new colors and styles.
Missed the IG live series? We’ve got you! Follow Jacob’s simple two-step process to take your dark colored garments to a new bleached out version. You can also check out his IG TV episode here.

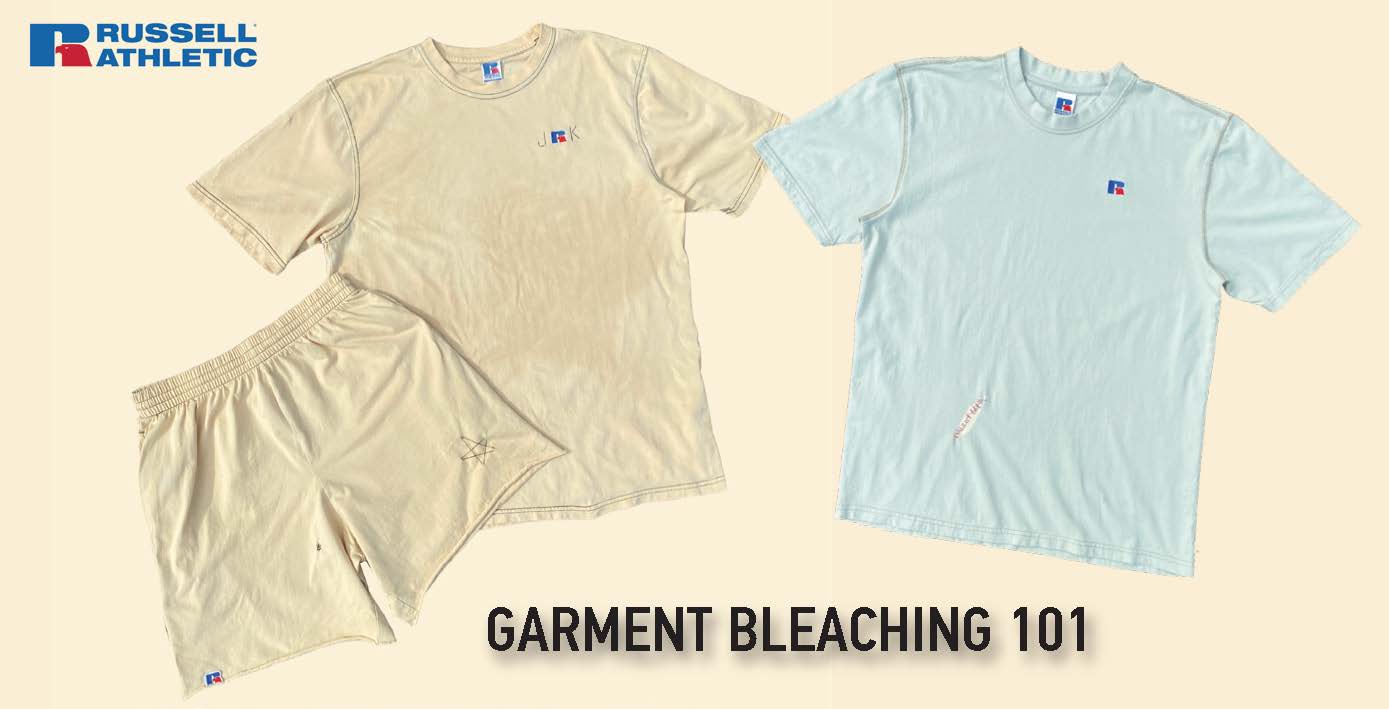
For this DIY Hustle from Home series, Jacob used Russell Athletic Baseliner Tees in black and Olive. Not feeling the black and green hues, choose any darker color from the assortment to create your own bleached out color. Jacob also bleached the black Russell Athletic Premium Cotton Classic Shorts, that he shorted to his preferred length
Grab the following supplies and check out the steps below.
-
Dark colored garment
-
Large bucket
-
Gallon of bleach (any kind will work)
-
Rit Color Remover
-
Large stock pot
-
Mixing spoon
-
Sewing kit for added details (optional)
-
Fabric scissors for cropping and chopping (optional)
-
Dremel for distressing (optional)
Step 1: Bleaching
Pour a gallon of bleach into bucket and dilute with HOT water. 80% bleach to 20% water. Stir bleach mixture and add garment, fully submerging. Let sit in bleach solution for 30 mins to an hour.
You should start to see the bleach solution pull out the dye in the first 5-10 mins. Keep in mind, the color is not going to be removed fully in step one. For example, a black shirt is going to turn to an orange/red hue.
Once shirt has soaked in mixture for up to 30 minutes, take it to the washer and dryer. Wash and dry in hot water and high heat. The higher the temperature, the better the outcome.
Step 2: Removing Color
Fill your large stock pot with water about ¾ of the way full. Bring to a boil to basically cook your shirt.
Now the magic happens. Adding the Rit Color Remover is key to this step. Rit color remover can be purchased at your local craft store or amazon.
Submerge your garment in the water and keep at a low simmer. This process will remove orange/red hue and turn it to a cream color. Jacob recommends using 1-2 packs, which can depend on how to light you want your finished garment.
While cooking, stir occasionally and let simmer for 20-30 mints. Within 10 mins you are going to start to see the dye seeping out. Once complete – throw it back in the washer and dryer for a completed garment.
Leave the garment as is or take it a step further by adding in your own stitch marks, crop, and distress. It’s your design to create.

Tips & Tricks
This method works best with thinner cotton-based fabrics. A thicker sweatshirt can work, but its best if its vintage or worn and washed for some time
When first starting you will have a bit of trial & error – not everything is going to work and not all fabrics will take to the dye/bleaching process.
Don’t start with your favorite shirt – test out an old one first.
Seeing white bleach spots or areas that didn’t take to bleaching? This is where you can add distressing, patches, or unique stitch marks to cover.
Shorts too long for your style, trim them to your desired length and rock the raw hem look


